
Last Updated on November 20, 2026
The location of a kitchen sink drain depends on the layout of the sink and the plumbing system in your home. The opening is built into the bowl, while the trap and connecting pipes sit beneath it. The sink outlet connects through a P-trap to the household drain line. The trap holds water to block sewer gases; its layout and venting matter more than where the bowl opening sits.
Center vs Side vs Rear Kitchen Sink Drain Comparison
A kitchen sink can have a center, side-offset or rear-offset drain opening in the bowl. The waste outlet still connects to a trap beneath the sink. The drain’s location can affect the sink’s overall appearance and functionality.
Center vs Side vs Rear Kitchen Sink Drain: Comparison Table
| Feature | Center Drain | Side Drain | Rear Drain |
|---|---|---|---|
| Space Efficiency: | Moderate, may interfere with under-sink storage. | Better, and allows for slightly more storage space. | Often frees central cabinet space, depending on trap routing. |
| Ease of Installation: | Easier, more traditional placement. | Moderate, depending on sink design and cabinet configuration. | Depends on outlet location, trap and cabinet clearance. |
| Drainage Efficiency: | Good, but can be affected by bottom flatness. | Good, similar to the center but may allow for better water flow on one side. | Depends on basin slope, strainer and plumbing—not position alone. |
| Under-sink Storage: | Less, due to the central placement of the drain. | Moderate, slightly more space than the center. | Potentially more usable space if the trap is routed toward the rear. |
| Check Price: | Center Drain Kitchen Sink | Side Drain Kitchen Sink | Rear Drain Kitchen Sink |
Related Post: Leak under the kitchen sink when water is turned on- Easy fix
-
Center Kitchen Sink Drain
A center drain sink has a drain that is located in the middle of the sink basin. This type of sink is often used in under-mount or top-mount configurations, where the sink is mounted under or on top of a countertop. Center drain sinks tend to have a more symmetrical and balanced appearance, and they can be easier to clean because debris is less likely to accumulate in the corners of the sink.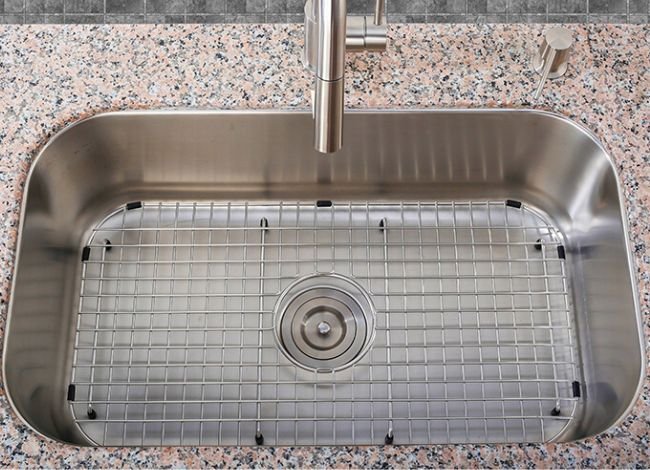
-
Side drain sink
A side drain sink has a drain that is located on one side of the sink basin. This type of sink is often used in drop-in or self-rimming configurations, where the sink is dropped into a hole in the countertop. Side drain sinks tend to have a more asymmetrical appearance, and they may be more difficult to clean because debris can accumulate in the corners of the sink.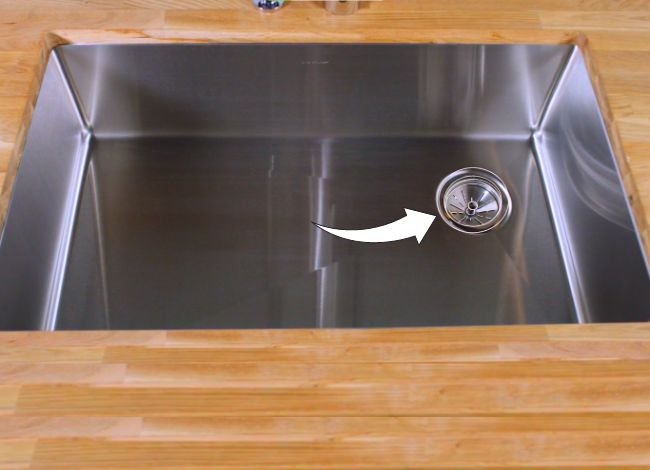
-
Rear drain sink
A rear drain sink is a type of kitchen sink with a drain at the back of the sink basin. It does not take up any space in the middle of the sink basin. This can allow for more usable space in the sink, making washing large pots and pans easier. Rear drain sinks can also have a more symmetrical and balanced appearance, which can be aesthetically pleasing. Because the drain is located at the back of the sink, accessing and cleaning may be more challenging. Rear drain sinks may also be more expensive and harder to find than traditional center drain sinks.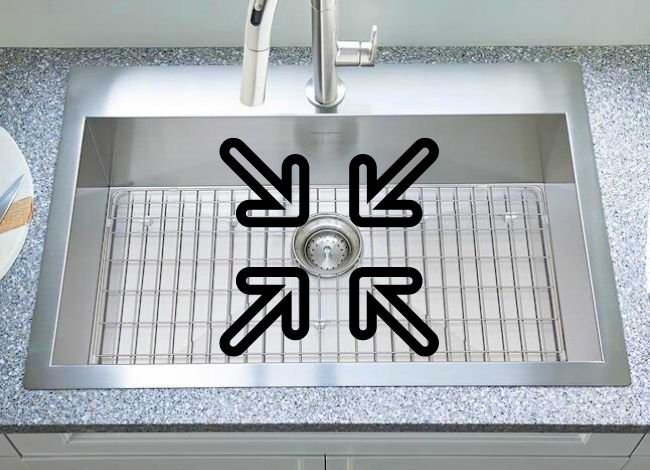
All drain sinks have their own advantages and disadvantages, and the best choice for your kitchen will depend on the layout of your sink area.
How to install a kitchen sink drain?
If you are ready to install your kitchen sink drain, you’ve come to the right place. Installing a kitchen sink drain is not as intimidating as it sounds, and with the right supplies and a few simple steps, you can do this job yourself. Here’s how to get started:
Related Post: Can I use Rid-X in my kitchen sink? Yes, but how?
Gather Your Supplies:
It is important to gather all the necessary supplies before starting any project. For a kitchen sink drain, you will need plumber putty, a basket strainer, a P-trap assembly, PVC pipe and fittings (if needed), rubber washers, and pliers.
Remove Old Drain:
Once you have all of your supplies ready to go, you need to remove the old drain. This part can be tricky, so make sure to use caution when removing it so as not to damage any pipes or fittings.
Install Strainer:
After removing the old drain, install the new basket strainer in its place. Make sure it is properly secured with washers and screws before moving on to the next step.
Connect P-Trap Assembly:
Now that the basket strainer is installed connect the P-trap assembly using PVC pipes and fittings if needed. This part can be a bit confusing, so refer back to your instructions if required while doing this step.
Secure Pipes:
Once all of your pipes are securely connected with the P-trap assembly, secure them together using plumber putty around each joint and tighten with pliers if necessary.
Test It Out:
The final step is testing out your new kitchen sink drain! Fill up your sink with some water, let it run down into the drain, and see if everything works properly – no leaks or weird noises! If there are any issues at this point, be sure to address them before using your kitchen sink!
Frequently Asked Questions
Does a rear drain always drain faster? No. Drainage depends on bowl slope, strainer, pipe sizing, venting and whether the line is clear.
Which drain position gives more cabinet space? A rear-offset drain can free up the middle of the cabinet, but measure the P-trap and disposal before choosing.
Can I move the drain opening in an existing sink? Usually not safely. Choose a sink with the required outlet position and adapt plumbing only where permitted.
Do center and side drains need different strainers? Not necessarily. Match the strainer to the opening diameter and sink manufacturer’s specifications.
What should I measure before replacing a sink? Check cabinet width, bowl depth, countertop cutout, outlet location, disposal clearance and trap alignment. Our sink sizing guide can help.